Using GFX just got easier. Now you can simply reference the driver you want from PlatformIO's repository in your platformio.ini file and access GFX.

Introduction
Note: This article does not introduce you to GFX. You can find the documentation for GFX here.
You can find a general guide and demo here, as well as drivers that aren't currently in PlatformIO's repository yet because I still need to do more work on them.
This article aims to acquaint you with using GFX from PlatformIO by way of its library import feature. With this feature, you no longer need to manually copy supporting files out of gfx_demo to use in your projects. Instead, you can simply reference the desired driver in your platformio.ini and the heavy lifting will be done by PlatformIO.
While GFX supports other platforms, the demo with this article was written for an ESP32.
Using this Mess
The trick here is to edit your platformio.ini file:
[env:esp32-ssd1306]
platform = espressif32
board = node32s
framework = arduino
monitor_speed = 115200
upload_speed = 921600
lib_deps =
    codewitch-honey-crisis/htcw_ssd1306
lib_ldf_mode = deep
build_unflags=-std=gnu++11
build_flags=-std=gnu++14
I'd like us to focus on the lines starting with lib_deps. That line tells PlatformIO to fetch the specified library and any dependencies. In this case, we're getting the latest version of the SSD1306 driver, which will also pull in GFX and the supporting bus I/O library. After that, we have lib_ldf_mode = deep. This is necessary so that PlatformIO finds the appropriate framework header files needed by GFX. Next, we have build_unflags and build_flags. These should be familiar if you've used GFX in your projects before. It changes the C++ standard from GNU C++11 which is the default to GNU C++14, which GFX requires in order to compile.
Once you do that, you can do something like this in your code:
#ifdef I2C // define I2C if using I2C. Otherwise defaults to SPI
#define LCD_PORT 0
#define PIN_NUM_SDA 21
#define PIN_NUM_SCL 22
#define PIN_NUM_RST -1
#define PIN_NUM_DC -1
#define LCD_WRITE_SPEED_PERCENT 800 // 800Khz
#define LCD_ADDRESS 0x3C
#else
#define LCD_HOST VSPI
#define PIN_NUM_CS 5
#define PIN_NUM_MOSI 23
#define PIN_NUM_MISO -1
#define PIN_NUM_CLK 18
#define PIN_NUM_DC 2
#define PIN_NUM_RST 4
#define LCD_ADDRESS 0
#define LCD_WRITE_SPEED_PERCENT 200 // 20Mhz
#endif
#define LCD_WIDTH 128
#define LCD_HEIGHT 64
#if defined(LCD_VDC_5)
#define LCD_VDC_3_3 false
#else
#define LCD_VDC_3_3 true
#endif
#include <Arduino.h>
#include <tft_io.hpp>
#include <ssd1306.hpp>
#include <gfx_cpp14.hpp>
using namespace arduino;
using namespace gfx;
#ifdef I2C
using bus_type = tft_i2c_ex<LCD_PORT,
PIN_NUM_SDA,
PIN_NUM_SCL>;
#else
using bus_type = tft_spi_ex<LCD_HOST,
PIN_NUM_CS,
PIN_NUM_MOSI,
PIN_NUM_MISO,
PIN_NUM_CLK,
SPI_MODE0,
false
#ifdef OPTIMIZE_DMA
,(LCD_WIDTH*LCD_HEIGHT)/8+8
#endif
>;
#endif
using lcd_type = ssd1306<LCD_WIDTH,
LCD_HEIGHT,
bus_type,
0, 4, LCD_ADDRESS,
LCD_VDC_3_3,
LCD_WRITE_SPEED_PERCENT,
PIN_NUM_DC,
PIN_NUM_RST,
true>;
lcd_type lcd;
using lcd_color = color<typename
lcd_type::pixel_type>;
The driver instantiation is slightly different for different device drivers due to them having different characteristics, and of course, your lib_deps entry in platformio.ini must reference the appropriate driver, but otherwise the code is the same for most any display. I have included an example of the 8-bit parallel bus in the example code but it's not shown in the excerpt above due to length and because the SSD1306 doesn't come in that configuration that I've seen at least.
There are drivers currently in the Platform IO repository as of this writing, with more added as I get the hardware:
- ILI9341 (SPI and 8-bit Parallel)
- ST7789
- ST7735 (green tab 128x128 only so far)
- SSD1306 (I2C or SPI)
- SSD1351 (no alpha blending)
- Waveshare 4.2inch grayscale e-paper
- Waveshare 2.13inch (B) 3-color e-paper
- Waveshare 1.54inch (B, version 2) 3-color e-paper
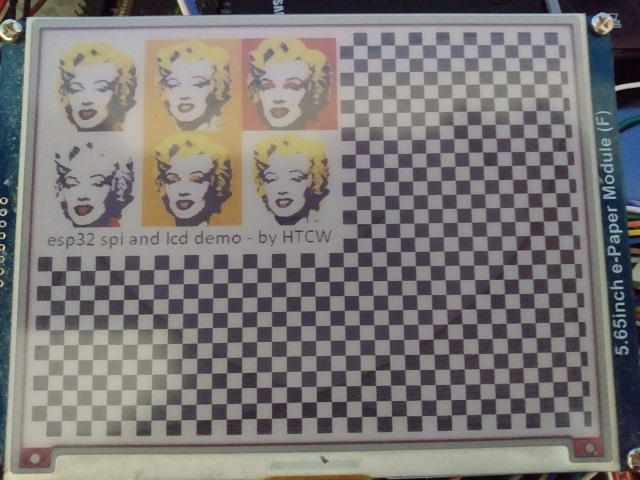
- Waveshare 5.65inch (F) 7-color e-paper (requires a WROVER or other PSRAM)
- ESP32 ESP-WROVER-DEVKIT 4.1
- ESP32 Lilygo TTGO
- ESP32 Lilygo T5 4.7 inch
- RA8875 (No alpha blending)
- MAX7219
- Wio Terminal ILI9341
- PWM LED controller
- RGB PWM LED controller
See the platformio.ini for the lib_deps lines needed to include those drivers.
There are ESP-IDF drivers in gfx_demo as well but I am moving them to this repository as I get time, or possibly releasing them as ESP-IDF components. I have not decided yet.
The Demo Code
The demo code was again, designed for an ESP32 and contains drawing code for several displays and configurations. You'll want to choose the configuration that matches your device.
config.hpp contains all the configuration information for the pins and drivers. It's a bit of a mess, but basically, it hides most of the differences between the different drivers.
The *.h files are jpg and font data used by the demo, embedded in program space flash.
main.cpp contains the primary drawing code. You'll note that it's largely the same for every device, with the exception of wildly different displays like the MAX7219 and the PWM controllers.
History
- 13th March, 2022 - Initial submission
- 22nd March, 2022 - Updated to reference new drivers, and more drivers.
- 25th March, 2022 - Added Lilygo T5 4.7 inch support
- 31st March, 2022 - Updated with more drivers
- 2nd April, 2022 - Updated GFX version
- 9th April, 2022 - Updated GFX version
- 13th April, 2022 - Updated GFX version
- 16th April, 2022 - Updated GFX version
- 19th April, 2022 - Updated GFX version
- 22nd April, 2022 - Updated GFX version and fixed demo to work with new SSD1306 driver version
Just a shiny lil monster. Casts spells in C++. Mostly harmless.


